Sunday, June 23, 2013

Pillow Palooza!

Recently I did a post on how to make a simple throw pillow using a ladder stitch to close. If you are not a fan of hand stitching, this post is for you.


First I picked my fabric. I usually use a different fabric for the back that matches whatever pattern I'm using for the front.


I then cut a 16 x 16 inch square for the front of my pillow (I'm using the same size pillow insert).


Next I made my back pieces. I cut 2 squares, both 16 x 11 inches. A great blog, Sew Mama Sew, has measurements for the most common pillow sizes/forms.


I folded the top (the wider part of the square) of each back square a quarter inch, ironed, then folded another 1/4 inch to make a hem.


I stitched down each hem.
Here are both back pieces with hems finished.


Now I arranged the pieces. The "front" piece right side up. The first "back" piece right side down, hem on bottom, on top of it. 


I then lay the second "back" piece right side down, hem up top, overlapping the first "back" piece.


Pin all pieces and sew, starting about a 1/3 of the way down one side of the pillow. When I got to a corner I stopped 1/4 inch away, left needle down, lifted the foot and pivoted to sew up the other side. Do not sew all the way to corners.


Once done sewing all the way around (overlapping a bit over the part where I started), I inserted the pillow form.


This is how the back of the pillow looks with the envelope closure. 


Envelope enclosures are great for when you have kids or pets and want to be able to take the pillow cover off to wash it. It also eliminates having to hand sew the pillow opening closed after inserting your pillow form.


~ B


Thursday, June 20, 2013

DIY Furniture Polish

Here is an easy recipe for making your own furniture polish with simple ingredients! Here is what you need:

* I would use only what is suggested for antique furniture. This worked well on my dining room table and chairs bought within the last few years.


Olive Oil, Vinegar, Lemon Essential Oil, a clean cloth and glass container.

Olive Oil shines and lubricates the wood, I used one cup.


As I've mentioned before, white vinegar is a great all purpose cleaner. This will draw dirt out of the wood. I added 1/4 cup of vinegar to the bowl with the olive oil.


I love me some Lemon Essential Oil. Both for the smell as well as the antiseptic & antibacterial qualities. I added about 15 drops to the mix.


Olive Oil does not make friends easily so I had to whisk the mixture around a bit before pouring it into a clean jar. You may need to give the glass a shake before your next use.


Dipped my cloth in the jar, a little goes a long way.


Polishes up well.


Making your own furniture polish is just one more way to save you money by using ingredients you already have in your house.

~ B


Tuesday, June 18, 2013

Quick Throw Pillow

Sometimes I get bored of my living room. Rather than move furniture around or paint the room a new color, I just change the accessories. A quick way to do this is by making new throw pillows.


This is not a complicated sewing project. Just pick your pillow insert (above is 16 x 16) and fabric.

I usually use a front fabric (pattern) and a back fabric (a solid that matches the pattern). 
The first thing I do is iron whatever fabric I'm using. This particular fabric is 100% cotton, quilting fabric. 

It's usually ideal to use home decor fabric (sturdier) but these pillows will just be for "show" and not handled too much.

Next, I cut both pieces (the fabric I'm using for the front and back). Measurements are personal preference. I used to take into account the seam amount and add a 1/2 inch to my measurements. Example: If I had a 16 x 16 pillow form I would cut the fabric 16 1/2 x 16 1/2 because I would be sewing with a 1/4 inch seam allowance.

Because this particular fabric had a lot of stretch and because I like a pillow to be "full" I stuck with 2 squares measuring 16 x 16 inches. 


~ Here are my front (left) and back (right) fabric ~


Next I placed fabric "right sides" together.


I usually start sewing about 1/3 of the way down, not at a corner. I have to keep in mind that I need to keep a space open to fit the pillow form in.

Again, I use a 1/4 inch seam, all the way around while I'm sewing. This particular foot has a guide attached to help me stay in that 1/4 inch but most sewing machines have measurements etched onto the plates.

When I was about a 1/4 an inch away from a corner I stopped.  


Leaving my needle down, I lifted my lever to pivot and position myself to sew up the next side.

Tip: stitch and backstitch when you start and finish sewing. This way the area around the opening is stitched tightly for when you are stuffing the pillow insert.


Next I turned the sewn pieces right side out.


Then inserted my pillow form.


Once the pillow form was inserted, I folded over the edges of the opening about a 1/4 inch and ironed them.
Next I pinned the opening closed.


The benefit of a "ladder" stitch is that, if done correctly, you don't see the stitch itself. I come in underneath the folded hem that I ironed and cross over underneath the opposite folded hem. I keep the stitching a bit loose as I go and slowly tighten up at the end. I found this video helpful when I first began to use a ladder stitch.


Here is the finished product:


You don't have to buy new furniture or paint to change up your living area. Finding a fabric you like and making your own throw pillows is an easy and inexpensive way to add something different.

~ B


Thursday, June 13, 2013

Make Your Own Body Butter

I really need to get better about moisturizing. I'm usually good about moisturizing my face since finding crow's feet and waging a full on war against the inevitable signs of aging. The rest of me remains largely ignored and unmoisturized...until now! I found this great DIY recipe for body butter at Rawmazing and decided to try it.


Here are the ingredients I needed:

1 Cup of Shea Butter

1/2 Cup of Coconut Oil

1/2 Cup of Almond Oil 

Essential Oil (any that is skin friendly)


While I boiled some water.....


I combined the cup of shea butter and 1/2 cup of coconut oil in another pot.


When the bottom pot was boiling, I placed the top pot with the shea butter and coconut oil on top to melt. I realized earlier that I didn't have a double boiler so  I MacGyvered these two pots and it worked just fine.


The coconut oil melted quickly, the shea butter took a few minutes longer as I stirred  it around to get the little pieces to melt.

Once both the shea butter and coconut oil melted, I took them off the heat and let the bowl sit for about 30 minutes.


After 30 minutes I added the 1/2 cup of almond oil...


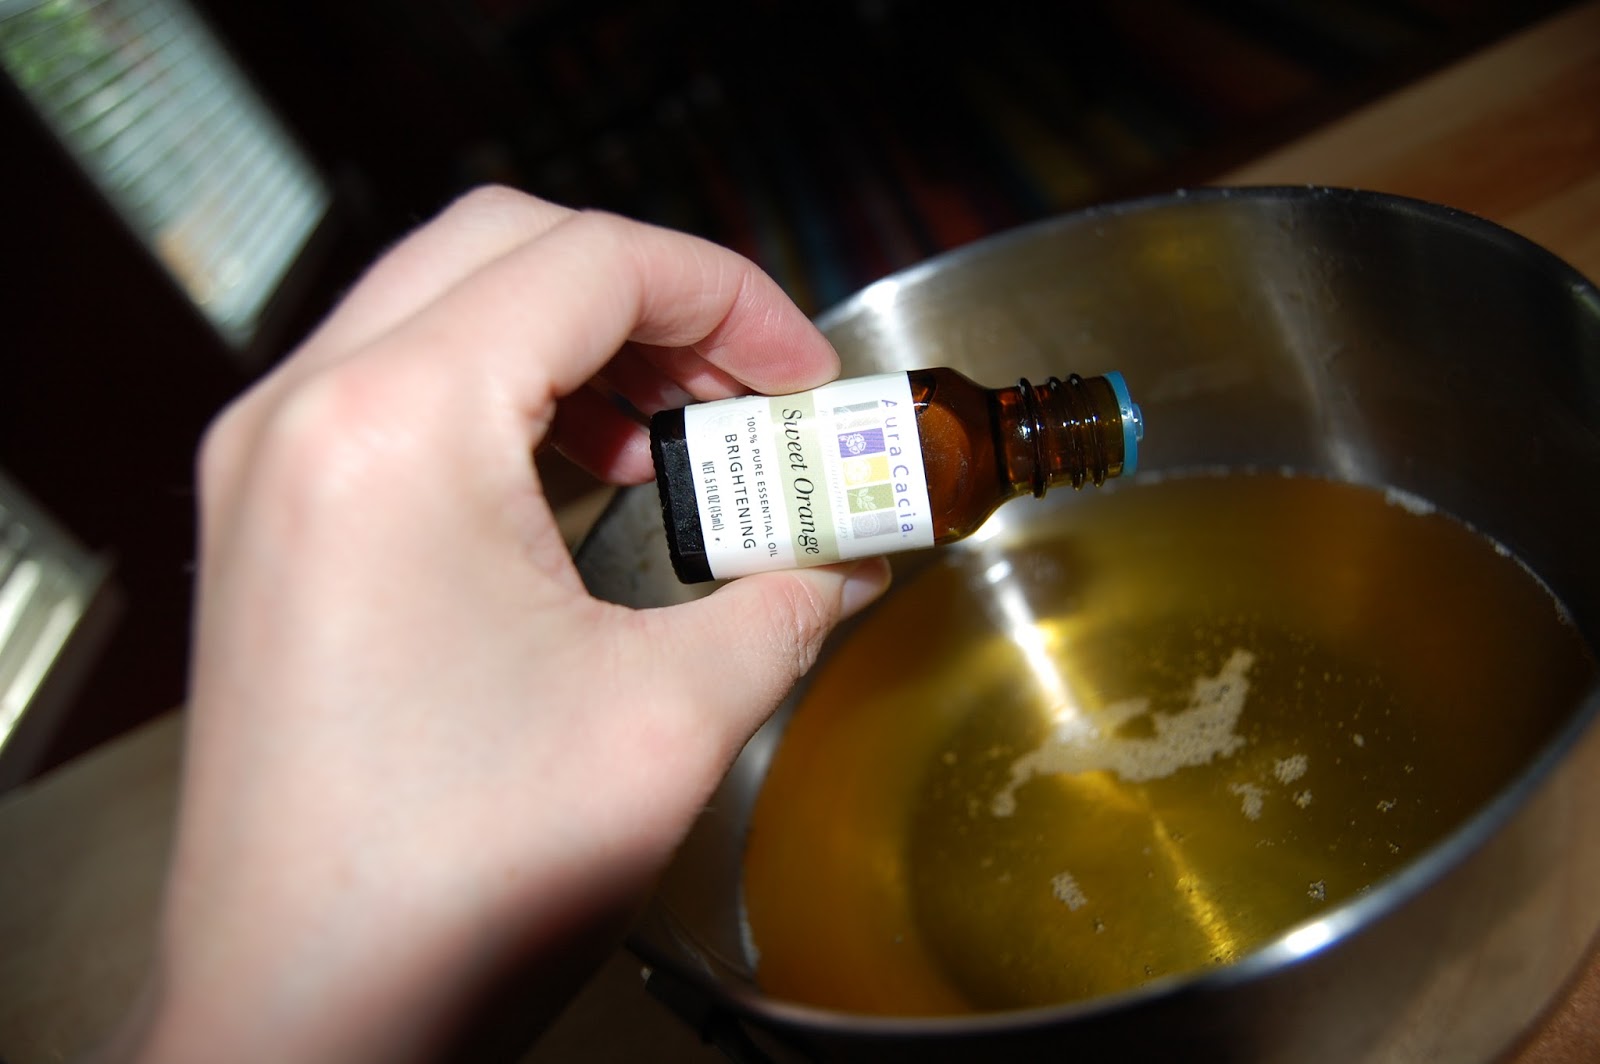
Then I added the essential oils I wanted (Lemon, Sweet Orange, & Grapefruit).

~ You can used any essential oils you wish. I'm probably going to use lavender  on my next batch and peppermint for a winter version. Just make sure the essential oil you use is skin friendly.~


The next step is to freeze it until partially solidified. I put it in my
freezer for about 22 minutes. 

As you can see, my husband has a love/hate relationship with Omaha Steaks (you've never heard such wheeling & dealing as when he is on the phone with them) and I have a love/love relationship with ice cream and bacon (not together, though I may need to think that one through....)


After the 20 or so minutes here is what it looked like:


I used my hand mixer to whip it into a fluffy butter type substance.


I had a mason jar handy but you can use any clean, glass jar. 


I have many clean, recycled jelly/jam jars I'm planning to use if I end up giving some body butter as a gift, but this batch is a gift to me.


It melts once it hits your skin and may feel a bit oily at first, but it absorbs nicely and leaves skin feeling soft throughout the day.

~ B 

Easy DIY Foam Soap

I love foam soap. I was the gal who always went for that pitch at Bath & Bodyworks,  buy 3 get 2 free or whatever their scheme was. But foam soap is primarily water with a little soap thrown in there so there's no reason I can't just make my own. 


I re-used the container of a generic foam soap. There are fancy foam soap containers at Brookstone and those type of places but I can't justify spending the money when I had perfectly good containers already.


I first filled my (7.5 oz) container up with a little less than a cup of water.


Don't fill it all the way, you want to leave room for the other ingredients and let the foaming pump be able to do it's job. Basically a little over 3/4 full.


I used Dr. Bronner's Peppermint Castile Soap which I found at my local Trader Joe's. I have substituted dish soap before and it came out just as well so no need to run out if you do not have castile soap handy.

I added a heaping tablespoon of soap to the water in the container.


Glycerin is optional, I added 1 teaspoon just for moisturizing purposes. I don't always use it but had some handy.


Vegetable glycerin can be tough to find sometimes. I get mine online at Vita Cost.


Lastly, I added a few drops of my Essential Oil.


I went with peppermint since my castile soap was already that scent but next time will probably use lavender. Lemon or Sweet Orange are other essential oils that would work, especially if the soap is to be located in the kitchen.


Now instead of buying more and more soap when we run out, I just fill my leftover containers with water, a tablespoon of castile or dish soap and I'm done. Simple and frugal.

~ B