Wine bags have at least two major benefits: they are a classy, lasting complement to a short-term (especially in our house) gift and they virtually eliminate the chance of you being a victim of police profiling. How? My researcher (husband doing a quick google search while also drinking wine) was unable to find a single instance of anyone ever being "stopped for questioning" while carrying an elegant
SDH wine bag. The same cannot be said for the garden-variety brown paper bag.
I read somewhere that not all adults drink wine (this is unconfirmed; please research independently before you repeat this). If this applies to you, making your own wine bag may still be a great idea. They make great wrappers for sparkling cider, flavored oils, or most any bottle you'd like to present as a gift.
Needed
Sewing machine
2 different paterns of fabric
Freezer paper
Scissors
Ribbon
One of the fabrics will be the bag liner. Since it will fold over the bag, it will be longer in length. The below measurements are for the "normal size" (aka 750 ml bottle). If your girlfriend is having trouble in the love department and it's looking to be a long venting session you may need the "big bottle" (aka however many millimeters are in that wonderful, larger bottle), you will then need to adjust your measurements accordingly.
- Inside fabric (liner): 16 1/2 inches
- Outside fabric: 13 1/2 inches
- Width for both is about 5 1/4 inches
Note: You need TWO pieces of both inside and outside fabric.
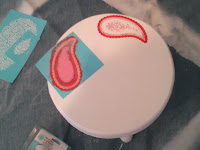
~ Use your freezer paper to draw your template on the non-shiny side. To make it a bit easier you can cut around your template, leaving some extra freezer paper around it ~
~ Next place your freezer paper template shiny-side down on your liner fabric. I make sure fabric is folded so I can cut both pieces at the same time. Iron freezer paper to fabric ~
You'll notice I cut out the actual template from the freezer paper, this makes it more difficult later when cutting around the fabric, hence my advice to leave extra freezer paper around your template when ironing to fabric. You will need to use the actual template shape for the second (outer) fabric but at least make it easier on yourself for the first fabric.
~ Once freezer paper is ironed to the fabric, cut fabric, using the template as your guide ~
~ Once fabric is cut to shape of template, peel template off (save for outer fabric) ~
~ Next iron the template (again, shiny side down) to your outer fabric. Since the template was made longer for the lining fabric, find the 13 1/2 in. mark on the template and cut across ~
You now have 4 cut pieces of fabric: 2 liner pieces & 2 outer pieces.
~ Take the outer pieces, right sides facing each other, and sew together. Up one side, around the curved bottom, and up the other side. I tend to stitch, backstitch, and continue stitching at the beginning and end of sewing fabric together, this keeps it strong and less likely to unstitch.
Tip: When you get to the bottom, curvy part of the fabric, you will need to slow down and lift the presser foot a few times to sew with the curve.

~ Follow the same instructions for the liner fabric except leave a 1 1/2 - 2 inch space at the bottom (curved) part of fabric. I mark them with pins so I don't forget to stop (take pins out as you get close, do not try to sew over them, I've heard horror stories of pins flying into eyes). When you stop sewing, back stitch a bit to make it a strong stitch. Same for when you begin sewing again, back stitch then continue stitching to make it strong. You will be pulling the fabric at one point and you want your stitches to hold ~
~ Now you want to take your outside bag fabric, turn it right side out, and put it inside the liner fabric (which is still inside out) ~
~ Once the outside bag is placed inside the liner bag, line up both top openings, with seams aligned, and sew around top. My machine has a part that can be taken out to make this step easier, yours may too ~
Your finished top should look like this:
~ Now pull the outer bag through that 1 1/2 - 2 in. opening we left in the bottom of the liner ~
For some reason, I thought I could keep myself out of this picture. Please do not hold my awkward, unflattering posture against me...
You will now want to stitch the small opening at the bottom of the liner closed. I usually use a
ladder stitch to close it but you can use your machine too, nobody will really see this part of the bag.
~ Now put the lining inside the outer bag and fold over top ~
Just insert wine bottle, tie ribbon around the neck, and you're done!
~ B


